Tuesday 27 July 2010

Fabrics and Dyes

The Bramble Patch run lots of workshops - if you live in the Midlands and enjoy textiles, quilting and mixed media they are worth a look.

On one of my recent Saturdays there we did a bit of fabric dying - great fun. This is what I completed hung out to dry when I got home after a thorough rinsing.


Last Saturday was Batiq Waxing and Discharging colour - here are my samples ...


Eventually these samples will all become 'something else' - I hope!

Monday 26 July 2010

Lutrador

On my latest Saturday class at The Bramble Patch we were experimenting with Lutrador, spray inks, fabric dyes and paints and printing phoographs onto fabric. The Lutrador was coloured to 'go with' a chosen photograph and then the printed photos were placed on the Lutrador and machine embroidered in as free a way as you wished.

This was my photograph


And this was my embroidered piece


I didn't really like it but I did like the offcuts of coloured Lutrador and completed a couple of 'sample' pieces at home. These are 6 x 4 inches and have been coloured with Adirondack Color Wash inks, gessoed and sprayed again. As the inks dry they lighten considerably creating a very subtle background.


This piece was gessoed and texture added to the gesso with a spatula. It was then 'painted' with fountain pen ink and sprinkled with salt grains. The salt grains were shaken off when the piece was dry. I then added some brighter spots of acrylic paint and backed the Lutrador with felt before machine embroidering over the painted sections with varigated matching threads.


This piece was just coloured with the spray inks then free machine embroidered with metallic thread. Toning beads were added in one section and the same metallic thread used to satin stitch one section and to fill another with french knots. If you click on the picture you should be able to see more detail although the colours don't show up very well.

Sunday 25 July 2010

Workshops

I love workshops - online and 'for real'. Some months ago I went on a 'real' workshop with Angie Hughes where we made woven bookwraps. I never really finished mine at the time but have just 'found' them and would like to to complete them - it's a cool idea. The idea was to weave strips of torn cloth, stamp and foil them, cover with organza and free machine over the top.


This is the first 'weaving stage


and here's one with some stamping and foiling added.
The finished piece below has been machined with gold thread and made into a book wrap.


I got quite carried away with these and have another ready to finish off ...


and here it is with red organza over - may decide to change this though - it's a bit too red for my liking!


Saturday 24 July 2010

Gorgeous painty backgrounds ...

... well I think so anyway. These 'postcards' are an amalgamation of lots of techniques gleaned from people like Kelly Kilmer, Mary Ann Moss, Dina Wakely, Tracy Bautista, Michelle Ward and probably many others - thank you to all of them! They are (mainly) collaged backgrounds, gesso, acrylic paints, spray inks, stencils and stamps. There are lots of layers. I have added a little collage to one or two - the idea being to use them as journaling cards at some point ...


Sunday 18 July 2010

More ATCs

These ATCs are made using packing tape transfers

Saturday 10 July 2010

ATCs

More ATCs - vintage sewing related theme.

Monday 5 July 2010

Memories and Reflections

I love Kelly Kilmer's blog and have taken several of her online classes - and have loved them all. The latest is Memories and Reflections which is similar to A Life Made by Hand but 'more' - I am already enjoying it. My friend Carol is also a member of this class and emailed today to say she is finding it hard to start! So I thought I would talk about how I go about making a page using one of Kelly's templates. Obviously I can't show the template itself on this blog as this is part of the class but for those who are able to access the group the template can be seen here - bottom row far left. If the link doesn't work it's MARTemp1 bottom row far left.

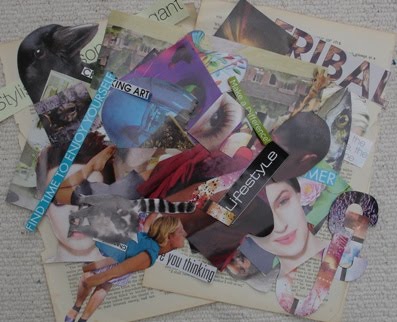
I spent some time on Saturday evening (while watching 'Con Air' - again!) cutting out images from two sources, a free glossy magazine that I picked up recently advertising events and places in the county of Buckinghamshire and an old National Geographic. I may try and limit myself to just using these as my main images for this journal.


I have a journal already made but have not constructed covers yet - I also decided that I wanted my pages all the same size they are approximately 71/2" x 51/2" - here is my first page


I really liked this sheep and chose her (she looks female to me!) as my main (focal) image. You can see that she is placed centrally and lower down than in the template sketch. This is because - in this case - the picture needed anchoring to the bottom of the page. I then chose an old book page as my largest background piece. The picture made me think of 'counting sheep' to get to sleep and so I used the words (from an advert) as another background piece and then decided on the red check as a third background and a matching journaling label for the fourth. For the last background piece in the bottom right hand corner I used this 3 printed from my PC because by this time the picture was making me think of the nursery rhyme 'Baa baa black sheep'. The 'extra' bit of red check down the left hand side was added to create a 'balanced whole' and was needed because my focal image is placed centrally and not to the left as in the template - it just looked better with it.

Hopefully you can see where my thoughts were leading me when completing this page and the journaling will probably reflect these thoughts - maybe something about my childhood and bedtime nursery rhymes. This type of 'thought process' often just happens when I make these pages even though the decisions to choose particular images aren't conscious ones. Try it and see!

Sunday 4 July 2010

Fabric Paper

I've been busy making fabric paper. I follow Beryl Taylor's method although I think there are others around. The basic principle is in her book, Mixed Media Explorations and she demonstrates it on an Interweave DVD called Layer by Layer.

This is 'paper' made with sweet wrappers. The brand name is a bit too visible but can be disguised in several ways e.g. heavy stitching or layering over the top, foiling and using paints or oil pastels.


Below are some small stitched samples using this paper. The fabric paper is backed with thin felt first.

This piece has been free machined with a couple of different threads, one varigated and one metallic and some foil added to cover the brand name on the right hand side!


These pieces are using the same paper and are from an idea in Quilting Arts magazine by Jackie Cardy. They are layered (all pieces are the same fabric papers) and then stitched, beaded and hand embroidered. The purple one needs a bit more added to disguise the brand name! Clicking on the pictures should show a bit mre detail - sorry the colours don't show up too well.

These fabric papers are made using gift wrapping paper