
Showing posts with label Challenges. Show all posts
Showing posts with label Challenges. Show all posts
Monday, 16 November 2015
Less is More
A final challenge card for today ... this is the Less is More One Layer challenge 'Santa'. I kept ths very simple and added interest by colouring in with different mediums ... acrylic paint, puff paint and stickles ...


Case This Sketch
Another Christmas Challenge card this time for CAS(E) this Sketch! ... this is a really pretty card ... it doesn't show in the photograph but the background is 'smooched' on with Glimmer Mists an has a lovely shimmer ...


52 Christmas Card Throwdown Challenge
Had a go at this weeks colour challenge today for 52 CCT Challenge Blog and this is what I came up with - it's pretty subtle but I quite like it ... the colours were Purple and Green (I've added a little red too) ...


Monday, 26 October 2015

Less is More Sketch Challenge
I am enjoying using Clean and Simple challenges to make my Christmas cards this year.
This one is for the Less is More Sketch Challenge ...

This one is for the Less is More Sketch Challenge ...

Saturday, 17 October 2015
CAS on Sunday 69
The CAS on Sunday challenge this week is 'Washi Tape' ... Which I have used behind my die cuts and stamping


Friday, 16 October 2015

Cas(e) this sketch 145
A card for Cas(e) this Sketch Challenge 145 and Kraft Journal Challenge 244 ...


I have used a lovely stamp set from Paperartsy - Nut and Meg 8
I am also entering this for The Kraft Journal Challenge 244 and have used stamping, die cut and glitter

Sunday, 11 October 2015

Tuesday, 16 September 2014
Mojo Monday
I haven't done this one for a while but i do like a sketch to follow and have always liked Mojo Monday's selection. Here's my card ...

Tuesday, 22 July 2014

Monday, 21 July 2014
CAS colors and sketches
Not too keen on the colors this week but quite like the card I have come up with for this weeks challenge over at CAS colors and sketches ...


Saturday, 26 April 2014
Challenges - Ink on my Fingers, The Artistic Stamper and Simonsaysstamp
This weeks Ink on my Fingers challenge is 'memories' ... my tag is in memory of my Nan (maternal grandmother) ... I have used scribble stain distress technique for the background (2nd technique in Compendium of Curiosities Book 1), flowers made from similarly stained paper and die cut with Spellbinders Rose creations die, some leaves (Memory Box die)' and a frame made by layering up Oval die cuts and embossing with copper embossing powder ...


The words, embellishments and charms all relate to things about her ..
Sewing words and phrases, doily lace stencil resembling the crochet she used to do, she liked a bit of bling, she loved flowers, she always had a pot of tea on the go, she could always find a safety pin when you needed one' and she was clever (the book charm) - she passed her exams to attend Grammer School in 1911 but her parents couldn't afford for her to go - her head mistress even offered to fund her uniform but it was still too much money and she never got there - her mother then died when she was 13 and she went into 'service' for her cousin who seems to have managed to marry 'well' ... this is a photograph of my Nan with her young charge aged about 14 ...
My Nan was the best - I miss her.
I am also entering this for The Artistic Stampers embossing/texture challenge
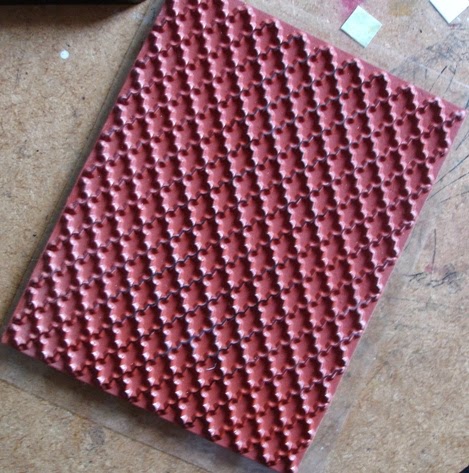
And Simonsaysstamp big stamp challenge (hard to see but I have used this gorgeous background stamp all over the distress inks for added texture)
Friday, 25 April 2014
Tag Along Challenge
The latest challenge from Tag Along is 'Pin Up' ... here's my version ...
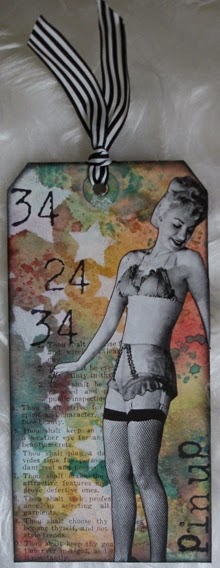
Wrinkle free distress background (I just Got Compendium of Curiosities 1 - I know - years behind :-)) - and I have used wrinkle free before of course but thought I might work through the book. PaperArtsy Fresco Finish paint in Snowflake through a star stencil from Dutch Doobadoo. The text is in Potting Soil Archival and is an old Rubber Baby Buggy Bumpers stamp and is instructions on how to take care of yourself in terms of beauty! The numbers and title are a Stampington Alphabet and are stamped in black archival. Black soot around the edge and a bit of silky striped ribbon to finish it off.
Thursday, 24 April 2014
PaperArtsy Weekly Challenge 2nd try
I wasn't at all happy with my first entry into this challenge and wanted to try again ... I have really loved Pam Thorburn's posts this week and wanted to carry on Gelli printing ... I don't 'scrapbook' but I do 'junk journal' and often use photographs ... usually I use patterned papers as backgrounds but Pam and a recent Gelli Arts video inspired me to try making my own ... I used PaperArtsy Fresco Finish paints in Guacamole, Claret and Snowflake and stamps from Plate ELB01 to make the pattern ... it turned out really well ...


When I started the page I had in mind the photograph I wanted to use which was a black and white one of my Dad chopping down a very large tree ... while I was looking for that photograph I found this one and the colours were just perfect (there's even some Guacamole coloured green moss on the rocks at the back) ... I love how that kind of thing happens when you work through a project!
The prints I started off with are below ... the first yellow one didn't work and the sheet on the left is where I brayered off my paint. I then tore some strips from this to make the paper ruffle which picks up the (very stylish!) ruched swimwear. I stamped the leaves from ELB01 onto off cuts from the original print to embellish the page ... and found some ribbon with a bit of sparkle ... all very simple. Oh yes I'm the one on the right - in orange - never worn this colour since!
Below are a few junk journal pages made some time ago in a similar style ... just trying stuff out and recording a little about the photograph/event.
Tuesday, 22 April 2014
Paperartsy Weekly Challenge
I haven't played along with this challenge for a while but this weeks first post by Pam Thorburn did inspire me - I have a Gelli plate and I needed to use it more.
When I woke up yesterday morning I had a VERY clear vision in my head of what this page would look like - neutral light background with the monoprint prominent and a framed floral element - this is NOTHING like that vision :-))


When I woke up yesterday morning I had a VERY clear vision in my head of what this page would look like - neutral light background with the monoprint prominent and a framed floral element - this is NOTHING like that vision :-))
It has somehow ended up with my favourite but overused colour combination of blue and orange - albeit muted - the paints are all PaperArtsy Fresco Finish. I'm not really happy with it though. I do like the background and I like the die cut flowers. I've added crayon to the painted background of the flowers using Prisma pencils and I have shaded around them with Bark Inktense pencil - these work quite well.The quote has got a little lost however and makes it look a bit messy - I need to re-think my 'journaling'. I will still enter it for the challenge - if it doesn't count that's fine - the monoprint is now invisible but I like to think it has added 'depth' to the finished piece.
Here are the original monoprints ...
... and the one I chose to work with ... Neutral, Light and all ready for that fabulous floral thing in a frame???
This is where it started going wrong - still fairly pale but it just wasn't doing it for me ...
So I ended up here after painting another sheet with those gorgeous blue and green Fresco Finish paints
Back to the drawing board I guess
Sunday, 20 April 2014
PaperArtsy Journal Challenge
Decided to have a go at Darcy's Journal page challenge this month over on the PaperArtsy blog ... however I have some limitations! I prefer to work on an smaller scale so cut my background card 6" x 5" ... because of the smaller size I only used a selection of the techniques Darcy used and my page is very different from hers ... although with a similar feel regarding the colours which I loved ...


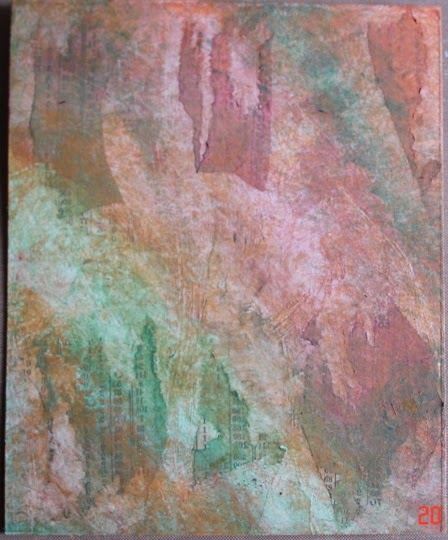
The techniques I used were ...
1. Ripped book pages for texture - taken from this old Ready Reckoner bought this morning for 50 pence at a car boot sale.
2. Mainly translucent paints ... I painted my card first with Snowflake Fresco Finish as it was a piece of packing - you can see it top right in the picture below ...
I mixed some of the translucent colours together but forgot to write this down in detail ... I used Blood Orange, Beach Hut, Zesty Zing, Tango, Limelight, Hey Pesto, Pumpkin Soup and Inky Pool. Right at the end I used a little Mermaid to the flowers and Little Black Dress around the edge of the card. This is the card at this stage ... all wiped back with a baby wipe as I didn't want this too strong.
3. Glued in stamped images - the heart frame and the flowers were stamped on separate pieces of painted white card, cut out and glued down ... the turquoise border was stamped directly onto painted background in Snowflake paint then filled in with Snowflake and then with Beach Hut mixed with Inky Pool and then re-stamped (badly - this was tricky but in the end I liked the grungy look this gave) ... this is how Darcy did her border.
4. Window frame - not sure how successful this is really but i like the way the flowers are framed
5. Using a white pen to highlight
6. Masking off areas - the turquoise border was masked when heart border was stamped
To do my shading I used an Inktense pencil colour Bark and like how it 'grunged' this up a bit
I meant to take a few more photographs along the way but got so involved I forgot ... I used PaperArtsy stamps - Swirls and Curls 4 (an all time favourite) , HP1009 and LPC014
PS Some of the other techniques Darcy used are on yesterday's hanging heart post- just coincidence!
Subscribe to:
Posts (Atom)