Showing posts with label Mixed Media. Show all posts

Tuesday, 22 April 2014

Paperartsy Weekly Challenge

I haven't played along with this challenge for a while but this weeks first post by Pam Thorburn did inspire me - I have a Gelli plate and I needed to use it more.

When I woke up yesterday morning I had a VERY clear vision in my head of what this page would look like - neutral light background with the monoprint prominent and a framed floral element - this is NOTHING like that vision :-))


It has somehow ended up with my favourite but overused colour combination of blue and orange - albeit muted - the paints are all PaperArtsy Fresco Finish. I'm not really happy with it though. I do like the background and I like the die cut flowers. I've added crayon to the painted background of the flowers using Prisma pencils and I have shaded around them with Bark Inktense pencil - these work quite well.The quote has got a little lost however and makes it look a bit messy - I need to re-think my 'journaling'. I will still enter it for the challenge - if it doesn't count that's fine - the monoprint is now invisible but I like to think it has added 'depth' to the finished piece. 

Here are the original monoprints ...


... and the one I chose to work with ... Neutral, Light and all ready for that fabulous floral thing in a frame???


This is where it started going wrong - still fairly pale but it just wasn't doing it for me ...


So I ended up here after painting another sheet with those gorgeous blue and green Fresco Finish paints


Back to the drawing board I guess


Monday, 21 April 2014

Playing card 8

Another 'heart' added today - love making these - just a little larger than ATC size ...


Sunday, 20 April 2014

PaperArtsy Journal Challenge

Decided to have a go at Darcy's Journal page challenge this month over on the PaperArtsy blog ... however I have some limitations! I prefer to work on an smaller scale so cut my background card 6" x 5" ... because of the smaller size I only used a selection of the techniques Darcy used and my page is very different from hers ... although with a similar feel regarding the colours which I loved ...


The techniques I used were ...

1. Ripped book pages for texture - taken from this old Ready Reckoner bought this morning for 50 pence at a car boot sale.
2. Mainly translucent paints ... I painted my card first with Snowflake Fresco Finish as it was a piece of packing - you can see it top right in the picture below ...


I mixed some of the translucent colours together but forgot to write this down in detail ... I used Blood Orange, Beach Hut, Zesty Zing, Tango, Limelight, Hey Pesto, Pumpkin Soup and Inky Pool. Right at the end I used a little Mermaid to the flowers and Little Black Dress around the edge of the card. This is the card at this stage ... all wiped back with a baby wipe as I didn't want this too strong.


3. Glued in stamped images - the heart frame and the flowers were stamped on separate pieces of painted white card, cut out and glued down ... the turquoise border was stamped directly onto painted background in Snowflake paint then filled in with Snowflake and then with Beach Hut mixed with Inky Pool and then re-stamped (badly - this was tricky but in the end I liked the grungy look this gave) ... this is how Darcy did her border.
4. Window frame - not sure how successful this is really but i like the way the flowers are framed
5. Using a white pen to highlight
6. Masking off areas - the turquoise border was masked when heart border was stamped

To do my shading I used an Inktense pencil colour Bark and like how it 'grunged' this up a bit

I meant to take a few more photographs along the way but got so involved I forgot ... I used PaperArtsy stamps - Swirls and Curls 4 (an all time favourite) , HP1009 and LPC014

PS Some of the other techniques Darcy used are on yesterday's hanging heart post- just coincidence!


Saturday, 19 April 2014

Shabby Chic hanging heart

In a few weeks I will be attending Beryl Taylors UK workshops and can't wait. In 'preparation' I have been revisiting her work and have altered  an MDF hanging heart over the last few days in her 'style' - homage to Beryl. It is a little difficult to photograph I hope this gives you an idea ... I have used Paperartsy paints and Pewter Treasure Gold to achieve the finish ... its has a nice muted silver finish in real life ...


The heart is approximately 6" x 5". Just to demonstrate my process I have added some extra pictures below ...


Covering the heart with scrapbook paper ...


The heart painted and stencilled (there are some tissue paper strips added under the paint for a bit of texture and a little crackling around the edges using Paperartsy Crackle Glaze and as I said the paints used are Paperartsy Fresco Finish in gorgeous pinky purples - I used Vintage lace, Mushroom, Spanish Mulberry, Rose and Squid Ink ..


I made the charm with glass beads and a chain tassel and drilled a small hole at the bottom of the heart to hang it ...


The square is silver card dry embossed with my Cuttlebug and then painted with Fresco Finish paints to make it 'shabby' with some brads is each corner. The centre heart is card covered with a little padding and a piece of silk painted with the Fresco paints to match the rest of the project. I have stamped it with a text stamp and wound wire and beads around it - this is similar in design to a piece I created years ago that I still like ...


Thursday, 13 February 2014

Journal Soup

Two more journal soup cards ...


Sunday, 5 January 2014

Art

I've made another card ...


And a mixed media postcard in the last couple of days ...


Wednesday, 1 January 2014

New Year

It's a new year and there are going to be some great new challenges over at A Little Bit Crafty starting today with Celebrate!

I've made a mixed media canvas using a Julie Nutting doll stamp an some beautiful flowers from one of our sponsors this month Petalu ...


Actually I didn't have a canvas in the size I wanted, 7" x 5", so I've used a piece of MDF instead.

Why don't you join us this month (and this year!) at A Little Bit Crafty - we have some lovely prizes from our sponsors ...


Friday, 4 October 2013

More classes

Earlier in September I took a class with Viv Denscombe ... she is a lovely tutor and I really enjoyed my day at The Bramble Patch .. best of all there are two more days booked with Viv in October and November ...

This is the project that Viv taught and for this first attempt I stuck fairly close to her colours and layout ...

I love how it turned out especially as I did the finishing at home alone! Adding my own colours using coloured pencils was lovely and I think it looks OK ...


The process uses Napkins, Paints, Stencils (hand cut), Die cuts, 'doodling' and stamping.

When I got home I tried a page of my own using similar techniques and this is progress so far ...


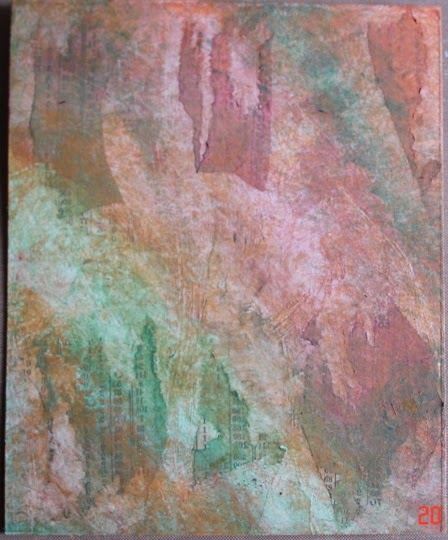
I wanted it to look like an old Fresco on a wall ... just got to work out a focal point now and finish it off.

Thursday, 3 October 2013

Classes

I've been busy taking a few classes recently ...

Last weekend I was with Lin Brown and a group of  Twitter friends having a wonderful time with Paperartsy Fresco Finish paints, stamps, embellishments and cardboard ... these are the projects we made ...


I loved how this turned out and for the first time I got the crackle to work perfectly! Lin is repeating this class and there may be places left ... I wholeheartedly recommend it - great fun ...


This is the front of the second project ... Lin's version was oriental but I stayed with the Lyn Perrella stamps from Paperartsy which I love ... some of the very first stamps I bought 15 years ago were by Lyn Perrella (sent from USA in those days!) ...


... and this is what it looks like opened.

Sunday, 7 April 2013

Another month gone ...

... so quickly.

I made this today - it's for an 'Altered Wooden Heart' swap. This poor heart has been through at least four incarnations and has ended up ENTIRELY different from my plan - which just wouldn't work.

I ended up over-painting several other layers of papers, collage etc and finally used some turquoise acrylic colours - then finally breathed a sigh of relief - I felt there might be somewhere to go. The painted background ended up so pretty I really didn't want to cover it up ...


... but I had to so in the end just did this ...


... I covered the sides in lace and copper and that's where it will be left ...


Saturday, 12 January 2013

Fantasy Film

I've been playing with Fantasy (Fusible) Film with these results ...


Faux carnival glass (tutorial by RachO113) - the light isn't great and the flash shows a bit but in real life these are very pretty and shiny.

I wanted to try something else so I took various scraps of painted paper and using gel medium pasted the film to the papers. For some of them I crumpled the film first and on some of them I cut little pieces out. I also glued the papers to lightweight card stock for a firmer foundation. 

When they were dry (well nearly dry ... I was impatient) I blasted them with a heat gun. They turned out very pretty and I used the Tim Holtz tattered florals die to turn them into flowers ...


Again in real life these are beautifully shiny. I curled the petals a little to give dimension. 

I only had one colour of Fusible Film - Crystal Aurora - from Crafty Notions.

Tuesday, 8 January 2013

Concertina Card

I've been working on this little project over the last few days - its made from an A4 sheet of Kraft card cut diagonally and then folded into four - I've decorated it for a sort of feminine/French(ish) feel


This shows it standing up ... and then I've laid it flat so you can see the pages more easily ...


The 'front' pages above and the 'backs' below ...


The tallest page has a pocket on both sides each containing a tag ... they were made this way because I only had 6" paper and it didn't reach to the bottom of this page! Embellishments are metal wood, shrink plastc and punches

Saturday, 5 January 2013

Tim's Tags 2013

This is based on Tim's first tag for 2013 although I didn't have the same products as he uses.


The embellishments are made from polymer clay pushed into a mould before baking. 

Thursday, 3 January 2013

Mixed Media Tag

This is a tag I have made following  tutorial by Rachel at Rach0113. Rachel is a brilliant mixed media artist and she has made some great technique videos. My tag turned out VERY like hers so thank you Rachel. This is for a swap so I hope my partner likes it ...


The swap was a product one and the product was 'Distress Inks' ... somy background uses the wrinkle free distress technique. It's hard to see in the photo but there is a layer of Iridescent Gold glimmer on top and some gold mica flakes (I have had these literally for YEARS and this maybe the first time I've used them!). The tag is collaged and I have made a charm to clip on the side.

Wednesday, 2 January 2013

Art Tiles

I have been having a lovely time making some mixed media art tiles. I pretty much followed a tutorial by Linda who's Youtube channel is called liveartnow - if you get the chance check out her other videos - she is a fabulous mixed media artist.


The square ones are 1" x 1" and are on wooden tiles and the round ones are a little bigger and are on chipboard. It's hard to see in the photo but they have a number of layers including gesso, torn paper and stamping. The colour is added with Distress Inks and each one has a layer of Glossy Accents on top to give a lovely finish. 

These really are fun to make, cost pennies (compared to the ones you can find in the shops) and are great embellishments.

Monday, 23 April 2012

Weekend ...

I don't have a lot to show for the weekend but I did watch a couple of inspiring videos. The first one here inspired me to these ...


They are tiles to be used as embellishments. The artist in the video used wooden tiles for her base ... I didn't have any, so cut up some matboard into 1" squares and used that which worked fine. My stamping was not good (mainly because I was too impatient for everything to dry thoroughly but these 4 (and 1 other) were acceptable out of the 10 I made (5 went straight in the bin!). I've covered the top left one with Glossy Accents and the others with various mediums just to see the difference. The fifth one is UTEE'd and this works as well as the glossy accents. I will definitely be making more of these.

The second video here was also very inspiring and although I don't have the Tim Holtz die I have cut by hand a strip of 'tickets' and plan to have a go ... watch this space?

Wednesday, 11 January 2012

WOYWW 136

Finished projects - Yaaay!


Two mini albums at the back - one just awaiting its cover decoration and the smaller one is 'in progress'. The tag and postcards have been completed for challenges and swaps and the other stuff is a recent purchase - a few additional beading supplies as I want to make some charms. If you like looking (snooping?) at other peoples work spaces check out Julia's Stamping Ground here.

I have added a video to Utube of my 'Floral Mini'.


And if you are still with me ... here is another photograph of Molly who will be coming to live with us in 6 days!!


Tuesday, 3 January 2012

Tag Tuesday

Here is my mixed media entry for Tag Tuesday - a new challenge blog - the theme is 'snow'. The base of the tag is felt with watercolour paper on the top and although the photograph doesn't show it too well it is quite shimmery. Silver thread has been used to highlight the snowflakes and beads and clear sequins sewn on to add more texture.